How To Make Your Own Nut Butters Using A Blender
Welcome to the world of homemade nut butters! If you’re tired of buying store-bought versions that are filled with preservatives and unnecessary ingredients, then this article is for you. Making your own nut butter is not only healthier, but it’s also a lot easier than you may think. And with the help of a good old blender, you can whip up your own tasty and creamy nut butter in no time. In this article, we will guide you on how to make your own nut butters using a blender, so read on to learn more.
The Basics of Making Nut Butters
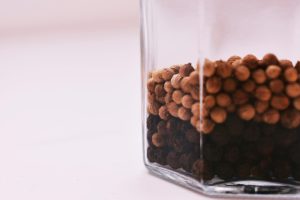
To make any type of nut butter, you need one simple ingredient; nuts. That’s it! However, the type of nuts you choose will greatly affect the flavor of your nut butter. While you can make nut butter using roasted or raw nuts, we recommend using roasted nuts. Roasting the nuts will enhance its flavor and make it easier for the oils to be released during the blending process. You can use any type of nuts, such as almonds, cashews, peanuts, or hazelnuts, depending on your preference.
The Key to Creamy Nut Butters: Oil
One of the challenges of making nut butter at home is achieving the desired creamy consistency. The secret to achieving a silky smooth nut butter is to add in a small amount of oil. You can use any neutral-tasting oil, such as avocado oil, coconut oil, or vegetable oil. Adding oil will help the nuts blend into a smooth paste, making it easier to achieve the desired texture.
Step-by-Step Guide to Making Nut Butter Using a Blender
Now that you have your nuts and oil ready, here’s a step-by-step guide to making your very own nut butter using a blender.
Step 1: Roast the Nuts
Start by preheating your oven to 350 degrees Fahrenheit. Spread your nuts evenly on a baking sheet and roast them for about 10-12 minutes. Keep a close eye on the nuts, as they can quickly burn. You can also buy pre-roasted nuts if you’re short on time.
Step 2: Let the Nuts Cool Down
Once the nuts are roasted, let them cool down completely before you start blending. This will prevent the nuts from clumping together and ensure a smoother blending process.
Step 3: Blend the Nuts
Add the cooled nuts to your blender and pulse it on a low setting. Gradually increase the speed to medium-high and let the blender do its magic. You may need to stop and scrape the sides of the blender occasionally. As the nuts break down, add in one tablespoon of oil at a time until you achieve the desired consistency.
Step 4: Add in Seasonings (Optional)
If you want to spice up your nut butter, you can add in some seasonings, such as cinnamon or honey. Blend for a few more seconds to incorporate the flavors into the nut butter.
Step 5: Store and Enjoy
Your homemade nut butter is now ready to be enjoyed! Transfer it to an airtight jar and store it in the fridge for up to two weeks. You can also freeze it for longer shelf life. Spread it on toast, use it as a dip for fruits, or add it to your smoothies for a delicious and healthy treat.
The Benefits of Making Nut Butter at Home
Making your own nut butter at home not only allows you to control the ingredients, but it also comes with many benefits.
Healthier Option
Store-bought nut butter often contains added sugar, salt, and preservatives. By making your nut butter at home, you can ensure that it’s free from any unnecessary and unhealthy ingredients.
Affordable
Homemade nut butter is much cheaper than store-bought versions. You can buy nuts in bulk and make larger batches of nut butter, saving you money in the long run.
Customizable
By making your own nut butter, you can customize it to your liking. You can add in your favorite flavorings, adjust the texture, and even mix different types of nuts to create a unique blend.
With this simple guide, you can now make your own nut butter at home using just a blender. Say goodbye to store-bought versions and hello to homemade and healthy nut butter. Get creative, experiment with different flavors, and enjoy the delicious and nutritious results!